 clayworkshop.com
Centering Clay on the Wheel
You will learn to secure and stabilize clay on a spinning wheel to prepare for symmetrical forming.
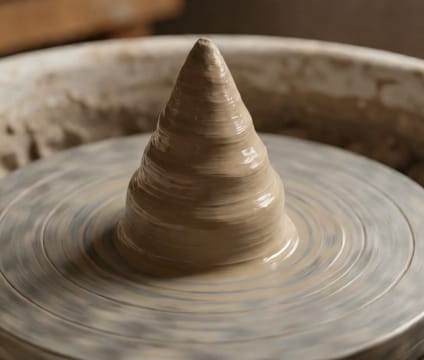
Begin by wedging your clay thoroughly to remove air bubbles and ensure uniform consistency. Once ready, dampen your hands and the bat or wheel head. Place the clay firmly in the center of the wheel head, press down to eliminate gaps, and turn the wheel to a moderate speed. Use the heel of your palms to gently compress the clay while keeping your elbows grounded and body stable. This initial compression helps lock the clay in place before shaping begins.
With the clay seated, gradually increase wheel speed while applying even pressure with both hands. Keep your hands wet but not slippery, using a gentle squeezing motion rather than pushing outward. Focus on creating a narrow, stable cone shape by bringing your thumbs together and drawing the clay inward from the top down. If the clay wobbles, reduce speed, re-center your hand pressure, and try again—patience builds muscle memory over time.
Once the clay sits true without vibration, you can begin to open it and shape the vessel form. Maintain consistent moisture with a sponge or water spray, and avoid sudden movements that might disturb the centered mass. If the clay starts to pull away or tilt, stop and re-center before continuing. Mastering this foundational step ensures balanced forms and prevents cracking or collapsing during trimming or firing.
Key points
- Wedging removes air bubbles and ensures consistency.
- Centering requires even pressure and steady hands.
- Stable centering prevents wobble and form failure.