 clayworkshop.com
Sgraffito Layering Techniques
You will be able to build controlled contrast and detail by scratching through layered slips and underglazes.
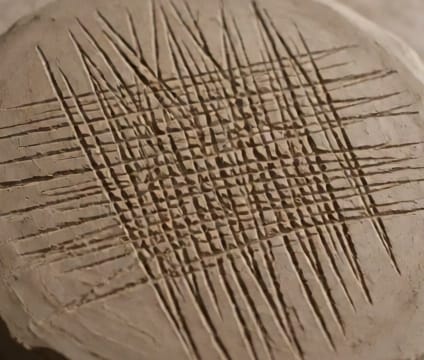
Begin by preparing a smooth, leather-hard clay body. Apply a layer of contrasting slip or underglaze—this top layer should be slightly drier than leather-hard but still workable. Allow it to dry to a dusty matte finish without full dehydration, so scratching remains clean and controlled. The thickness should be consistent to avoid uneven grooving during incising.
Choose a sharp, stiff tool like a ribbed metal needle or bamboo stylus. Hold it at a consistent angle—around 45 degrees—to the surface for uniform line width. Press gently but deliberately, following curves or contours with your whole arm to maintain rhythm and pressure. Avoid dragging the tool; lift after each stroke to prevent tearing or smearing the layer beneath.
After completing the design, inspect the surface for unintended lifts or blurring. Use a soft brush to remove dust, then apply a thin layer of clear gloss glaze to seal the incised lines and enhance contrast. Fire as usual; the exposed clay body beneath the scratched slip will absorb the glaze differently, deepening the visual separation between layers.
Key points
- Use leather-hard clay and dry top layer for clean incising.
- Maintain consistent tool angle and pressure for uniform lines.
- Seal with clear glaze to highlight the contrast.